STEAM Activity: Water Thermometer

Materials needed:

  • Clear glass bottle
  • Clear straw
  • Food coloring
  • Cold water
  • Bowl of ice water
  • Bowl of hot water
  • Molding clay
  • Gloves
  • Adult supervision

Steps:

  1. Add several drops of food coloring into the clear glass bottle
  2. Fill the glass with cold water
  3. Place a straw in the clear glass bottle. Using your molding clay, make a secure seal around the straw. Remember to make the seal as tight as possible.
  4. Now your thermometer is finished. The next step is to carefully place the bottle in a bowl of hot water (be careful).
  5. Wait and see what happens to the water in the straw.
  6. Carefully take out the bottle and place it in a bowl of ice water.

Before the activity

Ask these questions:

  • What do you think will happen when we put the glass in hot water?
  • What do you think will happen when we put the glass in cold water?

During the activity

Ask these questions:

  • What happens to the water when we add it to the glass?
  • Why do you think the water changes color?
  • What do you see?
  • Why is the water rising in the hot water?
  • Is there more water, or is the water expanding?
  • What is happening to the water in the straw when we place it in the cold bowl?
  • Is there less water, or the same?
  • Why do you think the water is going back down the straw?

Discussion

The purpose of this activity is the show how temperature affects the molecule bonds in water.  As water heats up, the molecule bonds expand, this is why water travels up the straw when submerged in hot water.  When water cools the molecule bonds become smaller, which is what happens when we place the bottle back into cold water. Use this activity as an opportunity to work on the children’s’ observational skills.  Ask them to describe what they see in detail.  Take note of what they say and look for opportunities to extend the conversation based on what they describe.

STEAM Activity: Walking Water Experiment

Materials needed:

• 7 plastic clear cups
• 6 paper towels
• Water
• Food coloring

Steps

1. Line up 7 clear cups and pour water in every other cup. Both end cups should have water.
2. Make sure there is less water in the two end cups than the two cups in the middle.
3. Pour a few drops of food coloring in the cups that have water.
4. Stir the water in each cup that has water.
5. Fold up a paper tower and place each end in adjacent cups. Make sure each folder paper towel is long enough to touch the bottom of each cup!
6. Repeat this process until all cups have been connected.
7. Wait and check back after a few hours.


Before the activity

Ask these questions:
• What do you think will happen when we leave the paper towels in the water?
• Can you give me a few possibilities of what might happen?
• Why do you think that?
• What happens when colors are mixed?

During the activity

Ask these questions:
• How many cups do we have?
• If I took 1 cup away, how many would we have left over? What if I added 1 cup?
• Out of these 7 cups, how many pairs of 2 can we make?
• What happened when we put drops of food coloring in the water? Why do you think this happens?
• If we mix different colors, what will happen? Why?
• How long do you think it will take for something to happen? Let’s take a guess.

After the activity

Ask these questions
• What happened here? Can you describe what you see?
• Some of the colors blended, what new colors did we create?
• How do you think that happens? Does mixing make new colors?
• What would happen if we mixed different colors?
• Are the new colors dark, or light?
• Did your prediction come true?


Things to remember

• Keep the conversation going before, during, and after the experiment.
• Let the children play an active role in setting up, making predictions, and conducting observations while you wait for the colors to change.
• Ask leading questions, and extend the conversation when they reply.
• Use phrases like, “why do you think that,” “tell me more,” or, “what would happen if…”
• Keep it fun. Laugh, be engaging, let the children enjoy the process.

Science terms to use during the activity:

• Experiment
• Blend
• Color
• Observation
• Mix
• Pattern
• Predict
• Data
• Design
• Cause
• Effect
• Dense
• Liquid
• Processes
• Absorb

STEAM Activity: DIY Liquid Steel

Materials needed:

• 2 bowls
• Clear glue (5 oz)
• Cold water (1/2 cup)
• Contact lens solution (4 tbsp)
• Silver pigment powder (0.1 oz)
• Baking soda (2 tsp)
• Warm or hot water (1/2 cup)
• Cookie sheet
• Fan or blow dryer

Steps

1. Pour clear glue into Bowl #1
2. Add cold water and contact lens solution into Bowl #1
3. Stir together
4. Add silver pigment powder to Bowl #2
5. Stir together
6. Add baking soda and warm water to Bowl #2
7. Stir together
8. Add 1/8 cup of Bowl #2 into Bowl #1
9. Pour mixture onto cookie sheet and dry using a fan or blow dryer
10. Explore the liquid steel


Before the activity

Ask these questions:
• “Does anyone know what steel is?”
• “Is still hard or soft?”
• “What kind of things can steel be used for?”
• “Do you see something that could be made out of steel in here?”

During the activity

Ask these questions:
• What do you notice happening?
• What happens when we stir this together?
• What do we usually use glue for?

After the activity

Let the children explore the liquid steel. Ask them to describe what it looks and feels like, and also ask the following questions:
• What is it doing?
• How can steel be liquid?
• What happens when things get hot, do they melt?


Encourage the children to have conversations with each other during this activity. At all times, encourage questions, encourage new thoughts, and let them explore the material freely.

Document observations on the white board, and try to extend their observations with new terms. For example, if they respond with, “It’s thick,” you can say, “Yes it is! Good observation. We can also say that it is dense, which also means thick.”

Don’t be afraid to introduce new terms – just remember to explain them in the context of the activity.


Science terms to use during the activity:

• Dense
• Heavy
• Metal
• Combination
• Experiment
• Project
• Mixture
• 1/2
• 1/4
• 1/8
• Tablespoon
• Measurements
• Adjustments
• Add
• Observation
• Record
• Discover
• Test
• Heat

Using Photography to Blend Technology and Science

STEAM_Blog_031816_Title

Nowadays, nearly everyone has access to a smartphone, tablet or camera.  These tools can be used to develop and strengthen your child’s understanding of physical science and mathematics.  The following investigative photography activity can help infuse critical thought and analysis into any preschool, or even at home.


Step 1: Introduction / tutorial

STEAM_Blog_031816_Graphic1

The first step is to assign the children to groups of 3-4. Once they are in groups, present them with the devices they will use for the duration of the activity. Using your own tablet as a model, teach them step by step how to use it and access the camera. Once the children are in their groups, and are familiar with their tablets, it is time to begin their hands-on introduction to technology.

Ask  questions about the device:

  • “What size is it?”
  • “What shape is it?”
  • “Is it heavy or light?”
  • “What do you think we could do with it?”

Allow them to investigate the device and become better acclimated to its functions with some guided instruction by saying things like, “If you press this button, this will happen.”  Once the children feel comfortable, it is time to start the activity.

Step 2: Explain the Assignment

STEAM_Blog_031816_Graphic2

Set the children up for their experiment. For example, you could say:

“As junior photographers on assignment, your job is to find something living inside of the classroom.  Work together to determine what it means to be living, and what it takes to keep something alive.  Remember, once you find your object, each of you will take a picture from a different angle.  Once you are satisfied with your subject, we will gather on the rug to discuss our findings.”

Step 3: Conduct the Investigation

STEAM_Blog_031816_Graphic3

The children will immediately begin investigating the classroom for what they perceive to be living. Many classrooms have pet fish, frogs, turtles, or even spiders. Remember that plants are living things, too.

During the activity, walk around and start conversations with the children about their approach to the activity:

  • “I see you found the fish. What do fish need in order to live?”
  • “What makes a fish different from a dog or cat?”

Probing questions will help the children expand on their learning.

Step 4: Share the Results

STEAM_Blog_031816_Graphic4

Once it is time to sit on the rug and present, ask the children to show their pictures and talk about what they found. Allow them to ask each other questions, or make comments about the pictures:

  • “What colors do you see?”
  • “How is this picture different from the others?”

With this activity, multiple aspects of STEAM can be incorporated:

  • Science—finding living things and discussing them.
  • Technology—using an interactive tool to find and locate living things.
  • Engineering—using the tool to reinvent how children see their environment
  • Arts—using creativity to produce fun and lively photographs.
  • Math—use math language to investigate their photos by finding shapes, angles, numbers and patterns.

Tablets and other interactive technology are a great way to make STEAM part of the preschool classroom. Modern tablets are more affordable than ever, and offer a full range of child-friendly settings.

Learning Goals:

  • Children should construct knowledge through active participation.
  • Children should be allowed to exercise choice in their learning experience.
  • Children should gain experience using technology as an aide in understanding their environment.

STEAM on a Rainy Day

STEAM_Blog_120515_1

If you are a preschooler growing up in a place like Southern California, there is a good chance you might have little experience with rain. However, that may likely change this winter with the arrival of El Niño. Rain and water play an enormous role in our lives: they keep us, and the planet, thriving every single day.

There are opportunities to teach children about the importance of water while engaging in fun, scientific activities. Please follow along for a fun, easy exercise that will make the rainy season a little more meaningful.

Rain in a cup experiment

Expecting rain? Instead of only preparing to combat the rain with jackets and umbrellas, take the time to conduct an easy experiment designed to get children to hypothesize rainfall. Materials for this activity are simple: a clear cup, a piece of paper and a black permanent marker.

Step 1: Talk about what to expect

STEAM_Blog_120515_2

With a storm looming, ask some questions about the weather:

  • “Why do you think it is going to rain?”
  • “What do you see up in the sky that might make it rain?”
  • “Where does all that water come from?”
  • “Do clouds have water in them?”

The key here is to encourage children to think about cause and effect: Clouds accumulate water, causing the rain to fall. As children begin to discuss their thoughts about the sky, make some mental notes on the conclusions they are coming to. Are their assumptions farfetched, or fairly accurate? This will help when it’s time to evaluate your findings together. Now ask about the effects of the rain:

  • “What happens when the rain falls?”
  • “What does ‘wet’ mean?”
  • “Does the water help with anything?”
  • “What does the rain do for plants and animals?”
  • “Do you notice anything different about our street when it rains?”

Children will begin to evaluate how rain affects the planet and can impact their lives. This is a profound moment because it draws a deeper connection between themselves and forces beyond their control, such as the weather.

Step 2: Conduct the experiment

STEAM_Blog_120515_3

Next, grab a cup, a piece of paper and a permanent marker, and talk about some hypotheses for the rainfall that is going to take place. Ask children the following questions and write down their responses:

  • “How much rain do you think will fill up this cup?” (Draw a line on the cup based on their response)
  • “How long will it take to fill the cup up that high?” (Write it down)
  • “What can we do with the water once the rain stops?” (Write it down)

After all the responses have been written down and the discussion is finished, place the cup outside in an uncovered area just before the rain begins. From there, you can sit back and enjoy the rainy day, but check on the cup every hour or half-hour to see how much progress has been made. Ask some hypothetical questions:

  • “If it rains this hard for another hour, do you think it will fill up to the line?”
  • “How much time do you think it will take to fill up to the line if it falls at this rate?”

Once the rain has subsided, gather the materials and head back inside for a discussion. If it doesn’t subside, conclude the experiment after two hours of consistent rainfall.

Step 3: Results and discussion

STEAM_Blog_120515_4

Take a look at the cup and see how much water it collected. Have children observe the cup and talk about what they think:

  • “What do you think about this?”
  • “Was your hypothesis correct?”
  • “Is there more or less water than you predicted?”
  • “Why is there less?”
  • “Why is there more?”
  • “Do you think if it rained longer the water would have reached the line?”

It is important to evaluate the results no matter what happened. Even if there was only light rainfall, talk about the water, how it gathered, and how discussions can be altered based on the results:

  • “I see there is much less water than we predicted, why do you think that is?”

Feel free to continue this discussion until you feel the children understand that predictions are simply guesses based on observations. Now, based on the responses given before the experiment began, take some time to discuss what can be done with the water that accumulated:

  • “Remember when we talked about how the rain helps the Earth?”
  • “Can you think of some ways we can use this water outside?”
  • “Can we water our plants?”
  • “Can we help fill a puddle for birds to drink from?”
  • “What else can we use this water for?”

Once a decision has been made, go outside and put that water to good use!

Follow This Recipe If You Want to Add STEAM to Your Holiday Cooking!

STEAM_Blog_111615_1

Don’t look now…but the holidays are officially here.

And what does that mean? It is time to start cooking!

Instead of cooking alone, invite your children into the kitchen for a fun, interactive STEAM opportunity. Cooking is a great way to teach your children practical life skills, while having a fun and meaningful scientific experience.  Science, technology, engineering, arts, and math are EVERYWHERE in the kitchen.  The key is you have to know where to look, what to ask, and how to make it fun.

Here are 4 simple ways to transform your day of cooking into a scientific adventure for you and your children. Please follow this recipe in the order given!

Step 1: Explore measurements

STEAM_Blog_111615_2

Cooking is the perfect way to help your children experience numbers and measurements in a real life situation.  It is important to recognize mathematical situations in your child’s everyday life, and even more so to talk about it.  Use open-ended questions to get your child to apply their knowledge in a practical way:

  • “The recipe asks for 1 and 1/2 cups of water –  what do they mean by 1/2?” Let your child explain their reasoning behind what 1/2 means.
  • “If I added 2 cups of water, would I have too much, or not enough?” When it comes time to cook, explore time by adding a fun game to the equation.
  • “The bread has to cook for 30 more seconds. How many times can you hop on one foot during that time?”

Make the experience fun, and remember to talk during the entire process.  Explain what you are doing, why you are doing it, and allow your child to ask questions.

Step 2: Explore texture

STEAM_Blog_111615_3

Rolling dough? Packing brown sugar? Melting butter? All of these cooking techniques are filled with opportunities to explore texture:

  • What does flour feel like?
  • What do you think makes the butter melt?
  • How does butter go from a solid to a liquid?

Invite your children to explore their senses and articulate what they are feeling and seeing. If you are making a pie, have your children roll out the dough and talk about what they are feeling (“Is it soft, firm, loose, dry, wet?” etc.). Have them talk about it. Ask your children prediction questions about the changing textures of common holiday dishes:

  • “What do you think will happen when we put the bread in the oven?”
  • “Will it change color?”
  • “Will it change texture?”
  • “What do you think is happening while it is in the oven?”

Asking these questions will help develop critical thinking skills and the ability to understand their physical environment.

Step 3: Explore technology

STEAM_Blog_111615_4

Obviously cooking would be much more difficult without the luxury of equipment and tools. Before you begin cooking, lay out all of the tools and equipment that will be needed to complete your dish. Lay out all cups, measurement tools, baking dishes, strainers, spouts, etc. Let your children explore the tools by asking them what they think they do:

  • “How do all of these tools help us cook?”
  • “What could we do if we didn’t have these tools?”
  • “What does an oven do?”
  • “What is the purpose of heat with cooking?”

Don’t be afraid to ask questions that may seem difficult—the point is to guide their thinking and help them develop critical thinking skills. Draw connections by telling your children how the tools help us achieve our goals: “We put the flour in the cup, which goes into the bowl, which makes the dough, which goes in the oven…” Applying logic to the flow of technology is extremely powerful. Don’t forget to let them hold, manipulate, and try out all of the tools you have (except the oven)!

Step 4: Explore taste

STEAM_Blog_111615_5

Now that you have explored measurements, got your hands dirty with textures, and investigated the uses of technology, it is time to taste! While your dish is cooking, ask your children to reflect on the activity thus far:

  • “What do you think about all of the measurements, textures, and technologies we played with?”
  • “Do you think cooking is fun?”
  • “What else would you like to cook next?”

Using the down time is a great way to make some predictions about how your dish will taste:

  • “What will it taste like?”
  • “Do you think it will be sweet, sour, rich, salty, bitter, etc.?”

Once the dish is complete, take it out, let it cool, and observe the final product. Ask some questions while you wait for it to cool:

  • “What looks different now that it is out of the oven?”
  • “What looks similar?”
  • “Why does it look different now?”
  • “Did heat make it change? What do you think?”

Drawing conclusions about cause and effect will help your child think in a dynamic way. And finally, once the dish is ready and cooled, have your child taste the final product and ask:

  • “What does it taste like?”
  • “Does it taste good? Why?”

Describe what it feels like as you eat. The important thing to remember is to always ask questions. Listen to your child and follow along their thought process. If you need to, guide them by asking leading questions. For example, ask “What do you think the heat does to the food while it is in the oven?” By asking this question, you are leading them to think about how heat makes a reaction and alters the composition of food—that’s science!

Remember: This can be done using ANY cooking method, dish, or style. Have fun, and remember to have your child question everything!

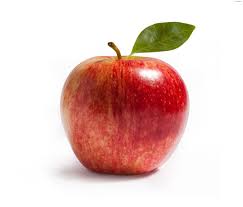
A Practical Guide to Apple Picking in Los Angeles, and How to Infuse Science and Math.

Unknown

Autumn–the time of year when leaves begin to change, the temperature starts to fall, and countless families make their way towards the nearest apple orchard.  What if I told you, you didn’t have to make a trip to Oak Glen to enjoy an apple picking experience with your family?  And what if I told you, you could pick apples while teaching your children about the wonders of science, technology, engineering, arts, and math?  I am going to give you a fun, easy way to enjoy what Autumn has to offer without having to spend much money, and without having to spend much time.

Grocery Store Apple Picking–With STEAM

Chances are you and your family make trips to the grocery store on a weekly basis.  How about turning one of those trips into a science filled apple picking adventure.  Here is the step by step guide to giving your child an intentional, science-based activity that anyone can do.

1. Make a plan.

Before you even leave the house, make a plan that will get the children excited about the prospect of finding the perfect, ripest apples possible.  Get a piece of paper, write down, and ask the following questions: How many apples should we get? What makes an apple perfect?  What colors do you think they have? Do we want heavy, or light apples? How many apples do you think it takes to make a whole pound?  On the way to the grocery store, start a conversation with your child by asking the questions I just mentioned.  You will be surprised how detailed and complex some of their answers can be.  Expand on some of their reasoning and ask more questions like, what else do you think? Tell me more about that.

2.  Get a basket, and head towards the “orchard”

Have your child hold the basket as you make your way toward the produce section of the grocery store.  Make the process an adventure, share in your child’s imagination by pretending you are in a great field with red and yellow leaves hanging on the trees, making  your way towards the ripest apples.

3.  Once you get there, let your child explore the apples

What do you notice about the apples? What colors are they? Are there big ones, small ones, medium ones?  Which one do you think is the heaviest? Can you pick 5 of your favorite apples for me? If you pick 5, and I pick 2, who has more apples? Asking questions makes the experience meaningful, it makes it more than just a trip to the grocery store to pick up produce.  Asking these types of questions nurtures curiosity while you both get to have fun.  Once you both have picked out the perfect amount of apples, make your way home to investigate your harvest

4.  Examine the harvest 

Now is the time to evaluate the bounty of your harvest.  Once all of the apples are laid out on the table, go back to the list you made before you left and re-examine the answers.  Ask the questions once again and determine if the answers remain the same, or different.  How many apples should we get?  Did you end up getting more, or less than you predicted.  What makes an apple perfect?  Do the apples you have now match that description from before the trip.  If not, what is different, what is the same.  What colors do you think they have? Were you able to find all of the colors you thought they might have.  Have your child sort the apples into different colors and find out. Do we want heavy, or light apples? Have your child estimate which apples are the heaviest, and which are the lightest.  Have him/her explain their reasoning behind the answer. How many apples do you think it takes to make a whole pound? Remember to weigh the apples for 1 pound while you are at the store, this way you can evaluate your child’s hypothesis.  Don’t forget to use the language that I mentioned during this post–examine, weight, pound, estimate, hypothesize, autumn, different, same, heavy, light, etc.  Exposing your child to scientific language in the context of a fun activity is meaningful, don’t be afraid of using big words.

5.  Document the adventure

Take pictures.  Save the notes of the questions you ask.  Write down some of your child’s answers.  Try the trip again and see if your child’s answers change, how they change, why they change.  Never stop asking questions.  Remember, having a great, meaningful experience with science does not have to be expensive, it does not have to take all day, and it does not require a background in science or math.

Things to remember:

The key to a meaningful STEAM experience is working with what you already have.  Far to often I hear, “I don’t have the materials to teach STEAM,” or, “I don’t know anything about science, how could I talk about it with my children?”  To put it simply, you don’t need to buy materials to teach STEAM, and you don’t need to know about science to talk about it with your children.  Children’s brains are naturally wired to ask questions, to inquire, imagine, predict, evaluate, and seek information.  They have billions of neurons continuously working to establish connections between the environment and their own perceptions.  So, much of the work is already being done, you just need to know how to organize the environment and ask questions in a way that facilitates their already impressive curious brains.

-Drew

How does STEAM influence social-emotional development? I will tell you how.

STEAM curricula promote children’s motivation, focus, detail-oriented exploration, and collaborative play


Contrary to previous theory (Flevell, 1963; Piaget, 1953), preschool children are able to grasp and articulate some form of logical, conceptual thought in science-based play activities (Nayfeld, Brenneman, & Gelman, 2011). How does this affect social-emotional development?  Children are encouraged to reflect on occurances that take place in the context of their immediate experiences.  Similarly, as reflective practices improve, so does the child’s ability to recognize emotions, a critical aspect of empathy development. Supporting children’s curiosity through open-ended questions encourages reflective speech; reflection, even in modest forms, helps children to understand complex concepts.  When children are exposed to scientific activities, they show significant increases in creativity, fluency, flexibility, originality and elaboration (Mirzaie, Hamidi, & Anaraki, 2009).  Exposing children to natural phenonema creates inquiry, which in turn illicits interest.  For example, showing a child how to put an egg through a bottle will create a “discrepant event,” or, a situation that does not make sense, which will invite clarifying questions.  Prompting scientific thought with questions and statements such as “What do you think will happen?”, “Let’s graph how far it is to the door,” or “Let’s hypothesize how long it will take the ball to roll down the hill” increases complex thought processes and encourage critical thinking.  Also, use of scientific language helps familiarize children with the terminology they will be using in formal education.

Rooted in STEAM curricula is the nature of peer-to-peer social interactions.  Preschool children will naturally engage in peer-to-peer exchanges; however, STEAM curricula offer an arena for collaboration and detail-oriented exploration.  Intellectual learning nurtures interactions both with materials and with peers; that is, in order to obtain clarity, children must manipulate materials and help each other to reach a common goal.  Once goals are achieved and cognitive equilibrium is obtained, children feel a sense of accomplishment and reward, which is motivating.

So what does this mean?

  • STEAM encourages reflection
  • Emotional recognition is critical for empathy development
  • Peer-to-peer interaction is built in to STEAM activities, which promotes socialization

The Art of Deconstructing an Activity with STEAM (Fall Harvest Edition)

pumpkin-simple-image

It is that time of year again, when the weather starts to cool and you are looking for activities to do with your student or child.  The fall harvest usually means one thing, pumpkins.  Pumpkin decorating has a long history of being a great opportunity to showcase our creative side.  Also, it is a great chance for children to get outdoors, pick a pumpkin, and decorate it just the way they like.

A typical pumpkin patch visit and activity will likely go as follows:

  • Take the children to the pumpkin patch
  • Allow them to explore the area and pick out the perfect pumpkin that they would like to decorate
  • Prep their station and teach them how to properly use their tools
  • Sit back and watch the children decorate and enjoy the pumpkin they picked out

How to S.T.E.A.M. a Pumpkin

Now, I am going to explain how you can take this simple, fun activity and deconstruct it to incorporate basic S.T.E.A.M. fundamentals. The key here is to be observant of what the children will be seeing that can be infused with S.T.E.A.M.  First, before the activity begins, ask the children to tell you everything they know about pumpkins.  Make sure you write down all of the descriptions and ideas that the children have so you can look back at it towards the end of the activity.  You may get responses such as: Orange, round, big, heavy, it has a stem on it, its bumpy, etc.  But you can also ask some scientific inquiry-based questions.  What do you think is inside the pumpkin?  How much do you think pumpkins weigh?  Are there different size pumpkins?  Once we pick our pumpkin, let’s hypothesize how much they weigh.

By setting up the activity through investigative type questions, you are getting the children to think about pumpkins in a scientific way.  They will now investigate their pumpkins in a deeper manner.  You will notice them lifting, touching, smelling, comparing their pumpkins to others.  This is important because it is teaching the children to think deeper about something simple, a pumpkin.

Once the children have their pumpkins picked out, it is ready for them to start decorating.  But before that happens, take a moment to revisit the responses the children made about their ideas about pumpkins.  Have the children estimate which pumpkin is the heaviest, and which pumpkin is the lightest.  Place each pumpkin next to each other and have the children compare and contrast the two.  Why do you think this pumpkin is lighter?  Why is this pumpkin heavier?  What makes something heavy or light?  Do these pumpkins have anything similar? The important aspect of this activity is to encourage mathematical thinking about a common environmental object.  Hypothesizing, comparing, contrasting, and estimating are all powerful mathematical and scientific behaviors.  If the children are having trouble understanding, lead them in the direction of thinking like a scientist.  Don’t be afraid to answer the questions yourself so the children understand what you are asking.

Now that the children have had time to investigate the science and math behind their pumpkins, let them decorate and customize their pumpkins anyway that they would like.  Allow their artistic side to come out.  But remember, don’t let that be a time for you to step aside.  You can always ask questions that have a scientific message.  I see you are putting big eyes on your pumpkin, what do eyes do?  What does a mouth do?  What does a nose do?  Asking these basic biological questions in the context of a pumpkin will help them visually understand that each body part has a specific function.  So, while the children are engaging in a fun, artistic activity, you can always S.T.E.A.M. through it by asking a few simple, intentional, and engaging questions.

Things to remember:

  • Ask questions about pumpkins BEFORE you go out
  • Ask questions about size, shape, smell, weight, etc
  • Compare and contrast different pumpkins in the classroom
  • Ask about the function of eyes, ears, nose, mouth while they decorate
  • Encourage creativity in their decorating
  • Use scientific language: hypothesize, compare, contrast, estimate, guess, function.

-Drew

STEAM and the Brain

STEAM instruction has been shown to increase not only math and science skills, but also expressive language, self-talk, memorization, counting, and reading skills.

 It is important to illustrate the distinction between “academic” and “intellectual” learning before discussing outcomes.  Academic learning is comprised of skills such as basic memorization, practice, counting, and reciting of information as a result of direct instruction.  Intellectual learning, however, is a comprehensive learning domain that involves reasoning, problem solving, hypothesizing, predicting, and reflecting.  Intellectual learning takes place naturally in a child’s environment through active engagement and exploration of materials.  Children gain expressive language skills, self-talk skills, and reading skills through child-engaged experiments that induce inquiry (Nayfeld, Brenneman, & Gelman, 2011).  The interactivity of STEAM curricula supports all the child’s senses: sight, sound, touch, smell, and even taste. Curricula that employ artifacts or objects of interest as focal points of instruction have been shown to increase time on task and attention, and to improve cognitive outcomes (Evangelou, Dobbs-Oates, Bagiati, Liang, & Choi, 2010).  Sensorimotor experiences mold and shape the developing brain; activities centered on multiple senses produce streamlined neural connectivity, or, smoother connections between thought and action (DiPietro, 2000).  When activities are multi-sensorily integrated, the opportunity for long-term learning increases. Furthermore, nurturing children’s innate curiosity through fun, interactive STEAM activities can enhance student interest.

What does this all mean?

Basically, children’s brains are primed for learning about science and math.  The natural inquisitive nature of their brains is starving for opportunities to investigate their environment.  Remember to ask questions that lead to complex thought.  Children are highly capable of exploring challenging scientific concepts if they are given the chance.

References

DiPietro, A. J. (2000). Baby and the brain: Advances in child development. Annual Review of Public                Health, 21,455-471.

Evangelou, D., Dobbs-Oates, J., Bagiati, A., Liang, S., & Choi, J. (2010). Talking about artifacts:                       Preschool children’s explorations with sketches, stories, and tangible objects.  Early childhood                   Research & Practice, 12(2), 1-16

Nayfeld, I., Brenneman, K., & Gelman, R. (2012). Science in the classroom: finding a balance between             autonomous exploration and teacher-led instruction in preschool settings. Early Education and                Development, 22(6), 970-988